This introduction to ArcGIS Online is 3 parts. I encourage you to do parts 1 and 2 in the same session. Then, if you need a break, take one before finishing up with part 3.
Part 1 – Sketch Markup
ArcGIS.com is a web service, just like Google Maps. However, it’s much more powerful.
ArcGIS can do pretty much everything that Google Maps does (create layers, add markup, change base maps, save your data, share to others, run datasets in and out from other other applications) and it can do a lot more.
In fact, it can do more than even Google Earth can do, but we’ll get to those things later. For now, let’s just view ArcGIS as a super Google Earth or Earth.
Let’s start with some background. ArcGIS.com is a creation of ESRI. Esri used to mean ‘Environmental Research Systems Institute’…now it just means ‘The company known as ESRI.’ They pretty much own the heavy duty geospatial tools business – everyone who needs enterprise-level GIS uses them. They also hold a conference every summer in San Diego (http://www.esri.com/events/user-conference) and it has a truly jaw-dropping number of sessions covering an insanely wide variety of topics.
ArcGIS Online, ArcGIS.com, is ESRI’s move to the web. Thankfully, you can use it for free (once you set up an individual account with ESRI)…plus Lehigh has an institutional account (which you can access with your Lehigh computing ID).
To get started:
- Go to ArcGIS.com

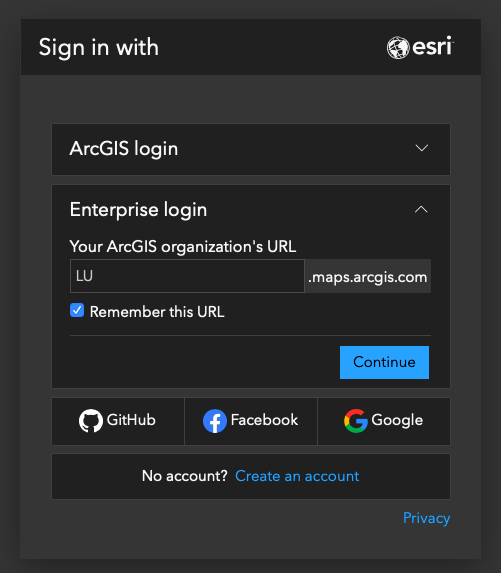
- Click “Sign In”
- In the box for Enterprise Login, enter “LU” (for Lehigh University) and check the “Remember this URL” box.
- Click “Continue”
- Click “Lehigh University”
- Login with your Lehigh account
Chose “Students, Faculty, & Staff”

For a more detailed login walk-through, check out this document that includes multiple screen shots and troubleshooting steps if you’re having issues.
Once you’re logged in, let’s make a map: Go to the MAP tab at the top of the page
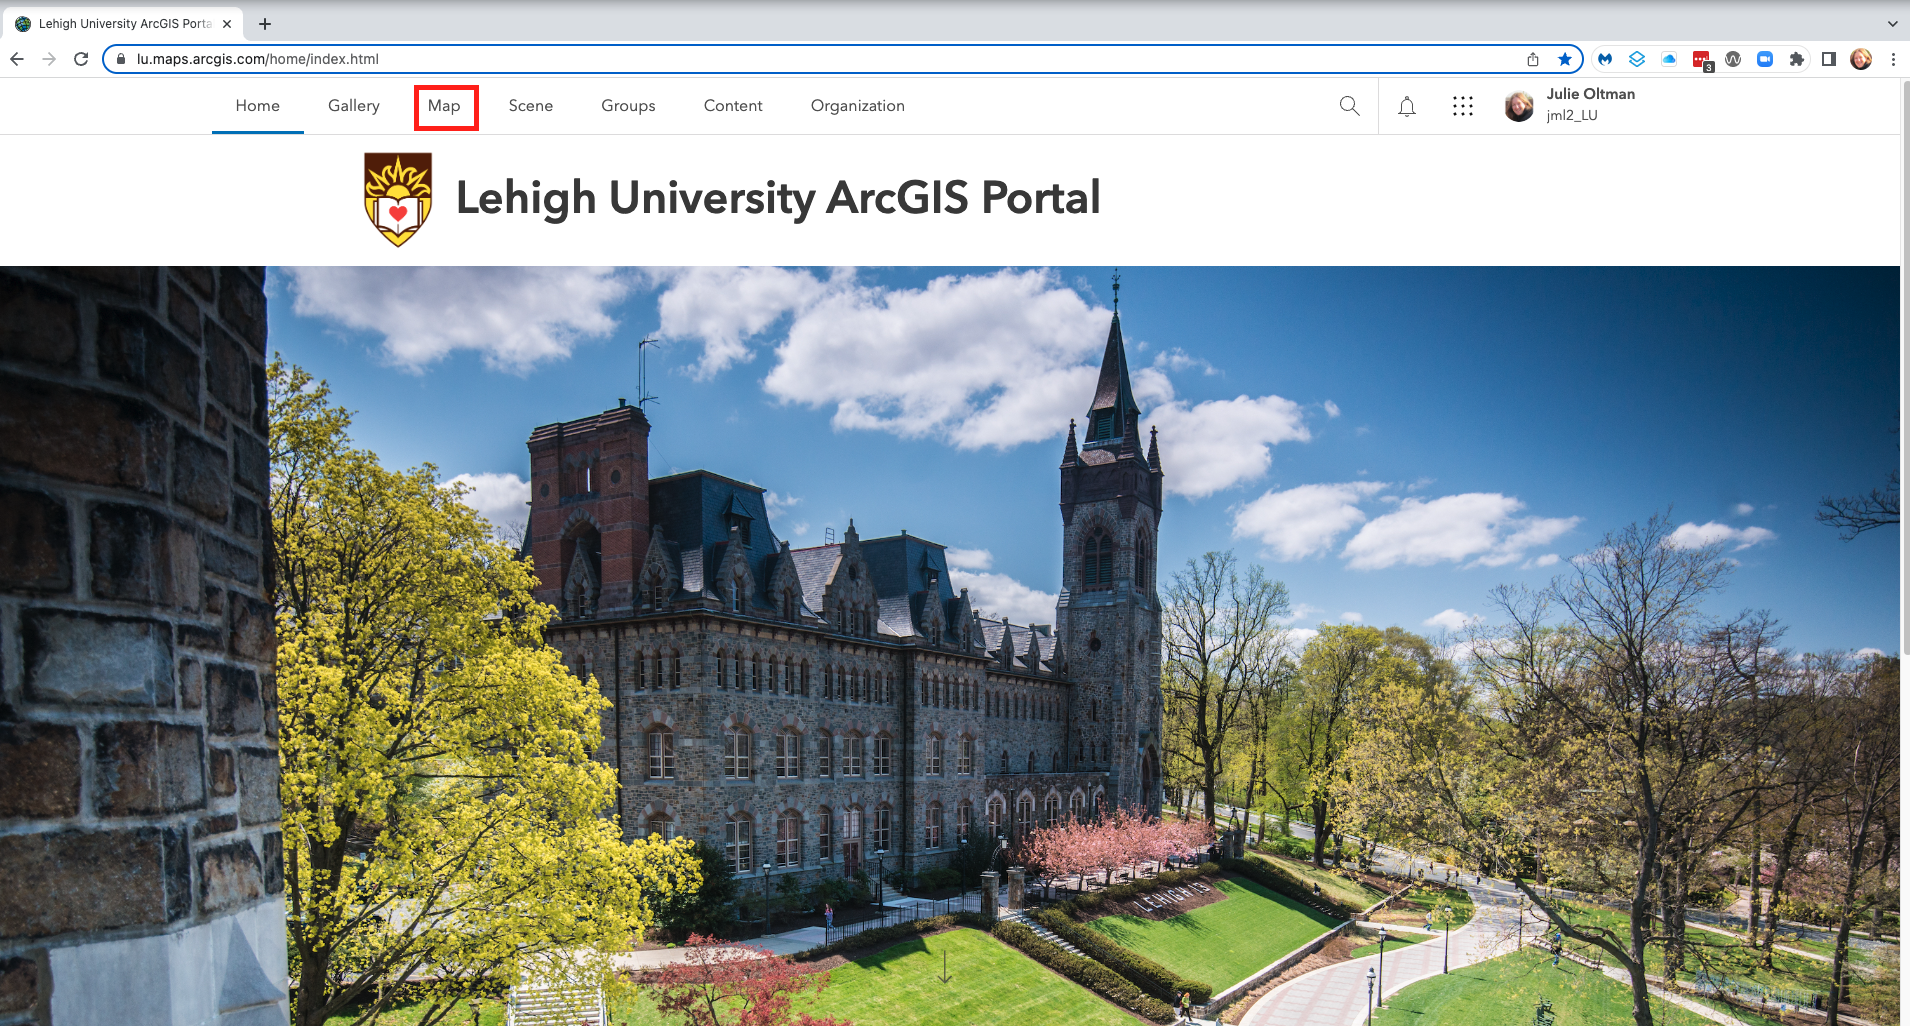
ArcGIS opens a new, clean map with the default base layer (Topographic) and nothing else.

From this point, we’re going to try adding some data. To do the sorts of things you do in Google Maps or Earth, try ADD -> Create Sketch Layer
You could also do this by clicking the “Add Sketch” button in the right side panel.
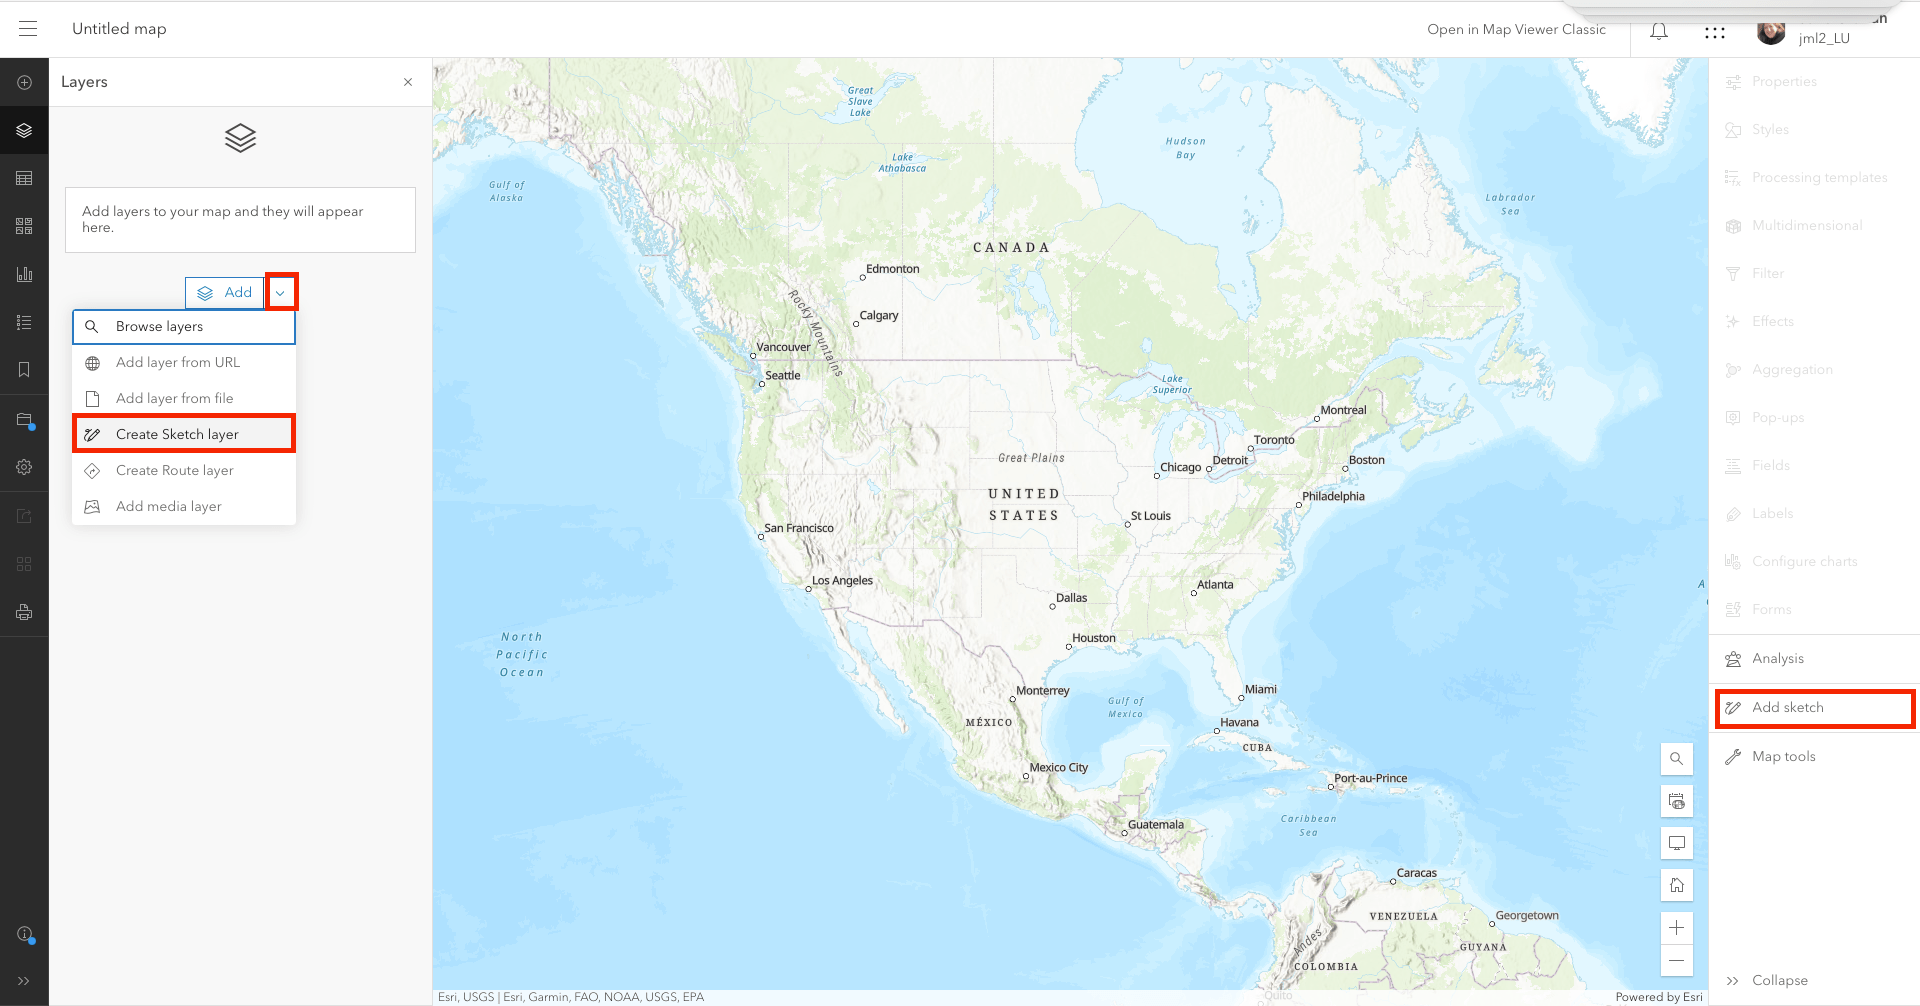
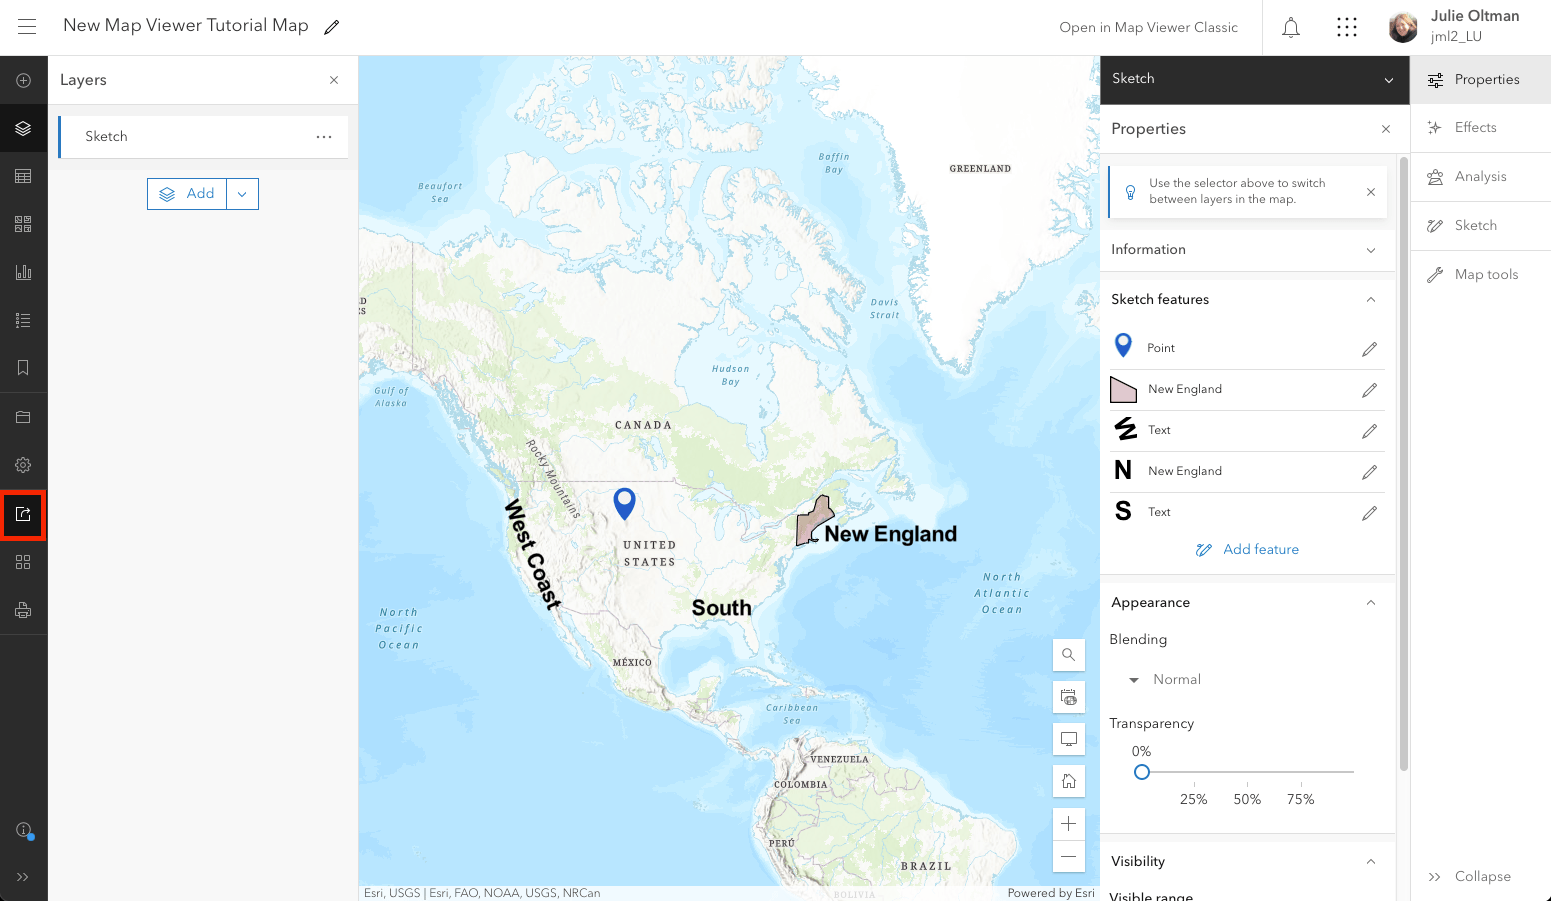
Just like in Google Maps, you can add points and paths…but you can also add polygons! Arrows! Circles! Text labels! Basically, this web service is made for map-making…Google Maps was just made for some light markup.

Try adding some markup to your map!
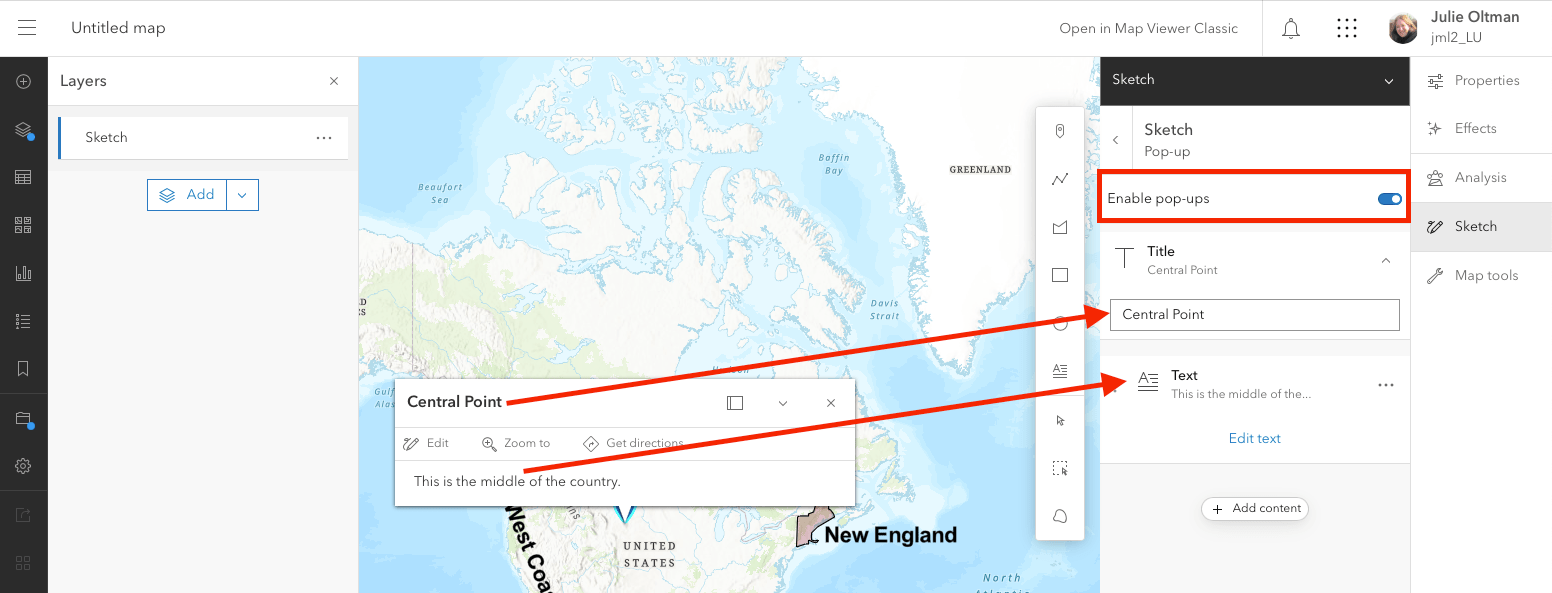
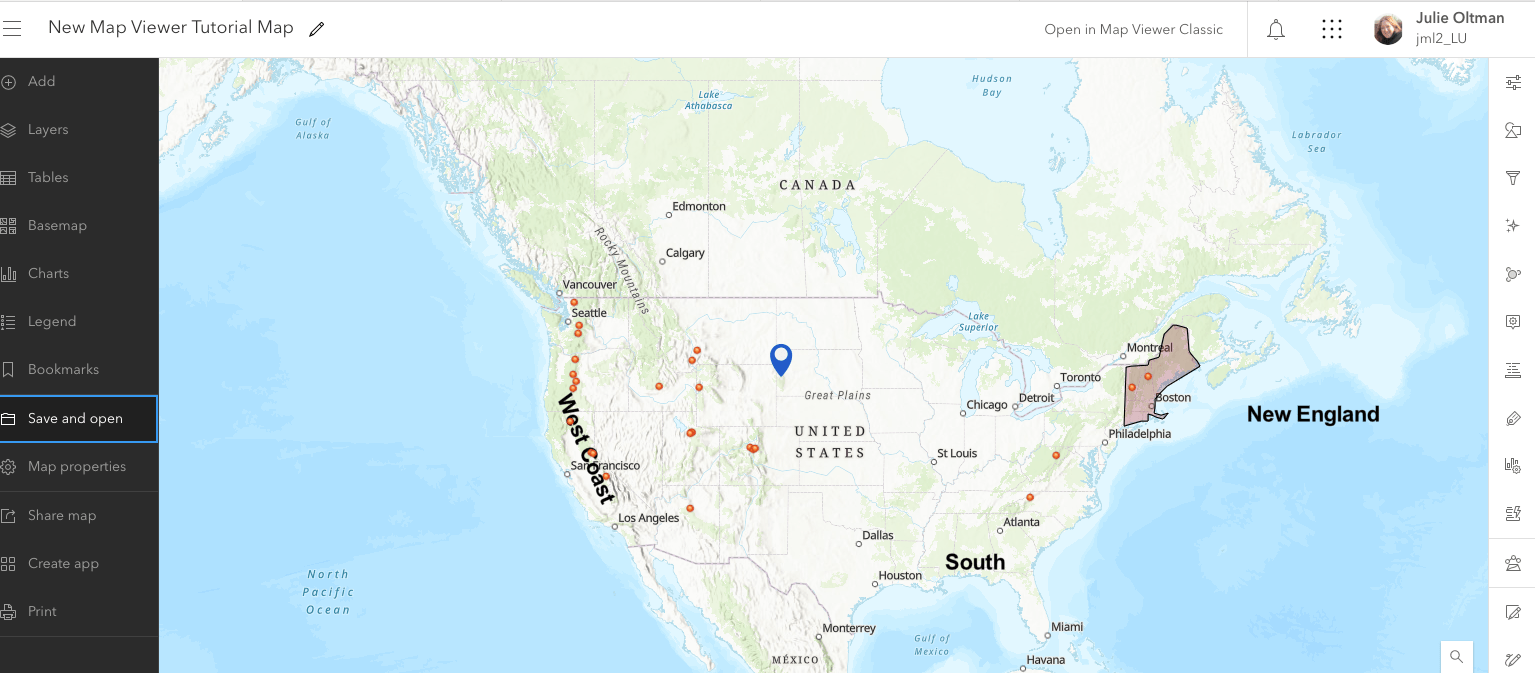
Here, I selected the Stamp tool (or place mark tool) and the Polygon tool and created a place mark in the midwest and an outline of New England. To edit the markups, just use the Select tool and you get an array of options.
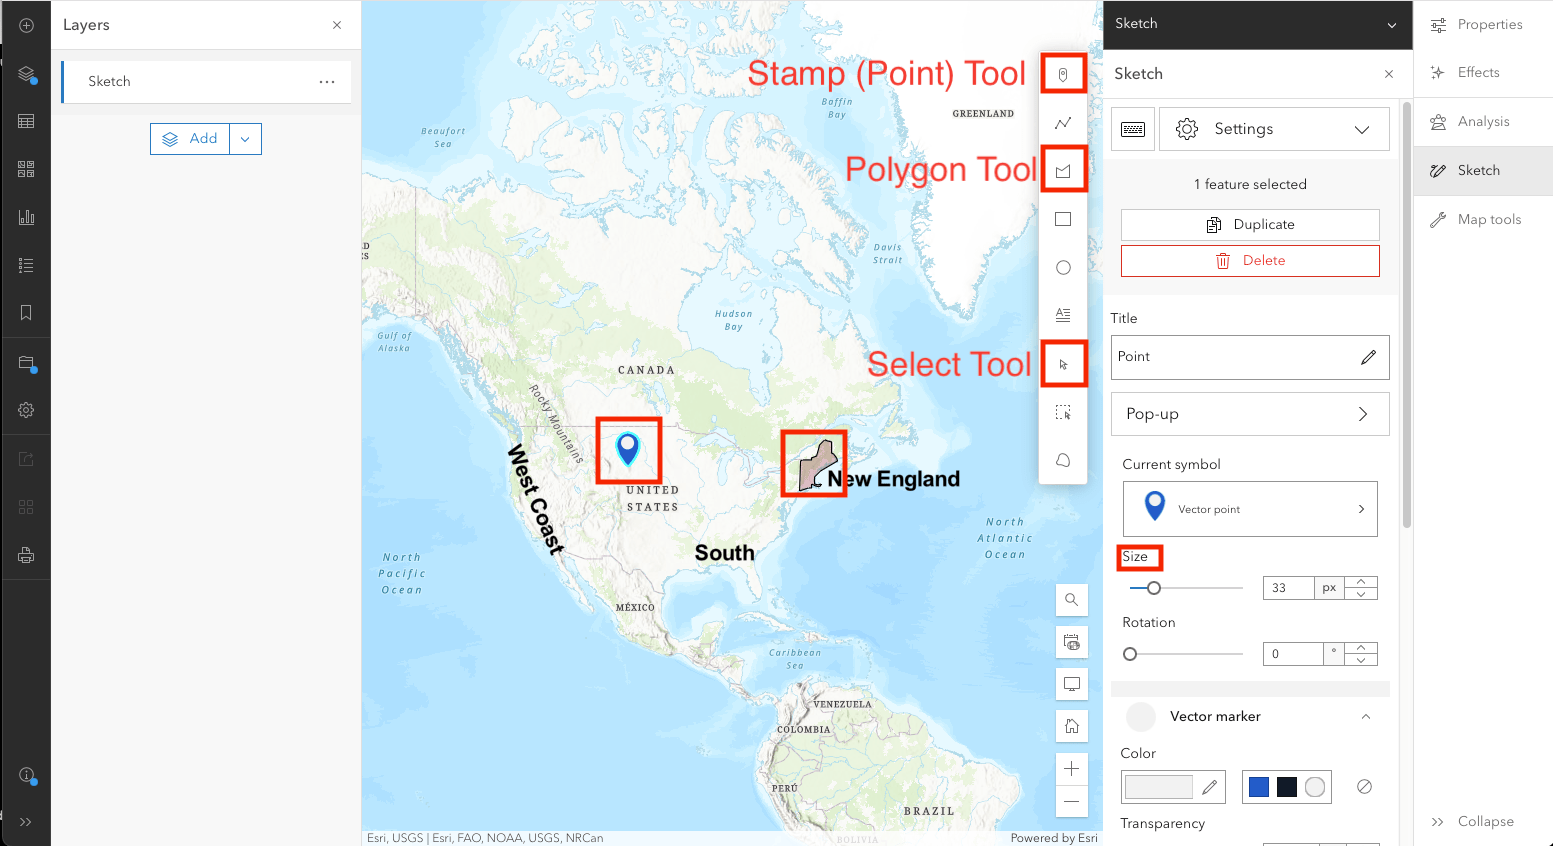
If you would like a pop up box to appear for any of your markup items when users click on items, just use the Select tool to select the item and then click “Pop-up” and toggle it “on”. Then you’ll get a nice pop up box where you can add text, images, urls, etc…to provide additional information.

But this just scratches the surface of what can be done. The other options under Add are where the real action is.
Part 2: Organizing your Work
Save your Work! Unlike Google Maps, you do need to Save your work (or do Save As to save different versions).
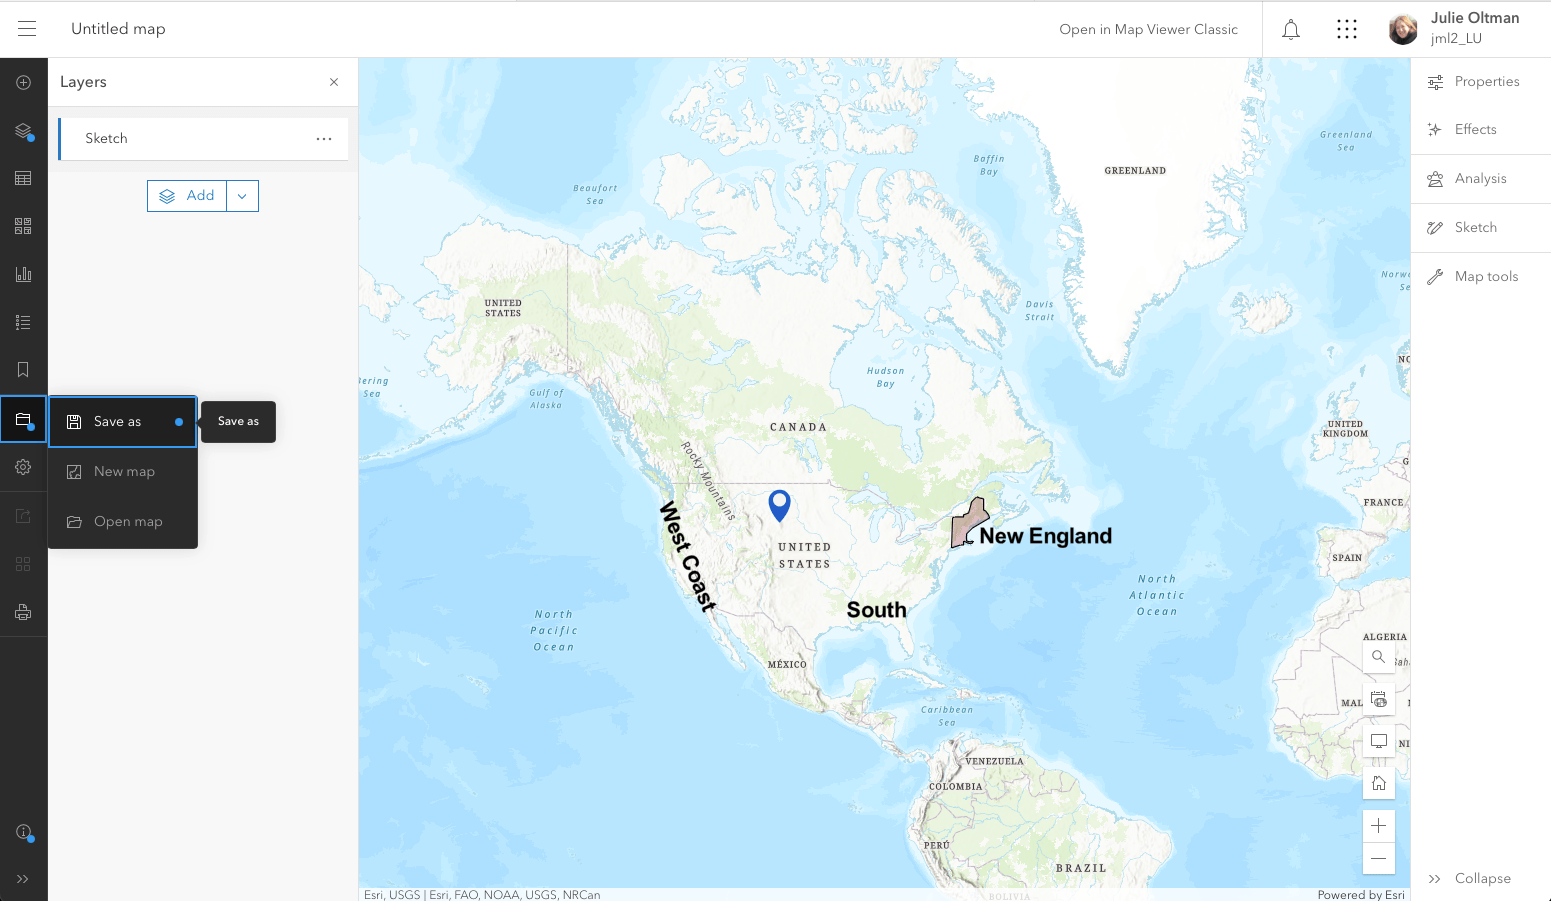
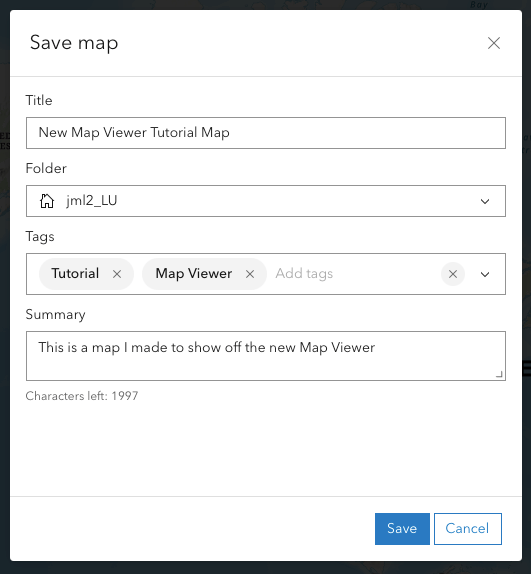
A pop up will appear where you can give your map a name, tags, summary, and where you can choose a folder in your content library on where to store the map. (more on that next!)
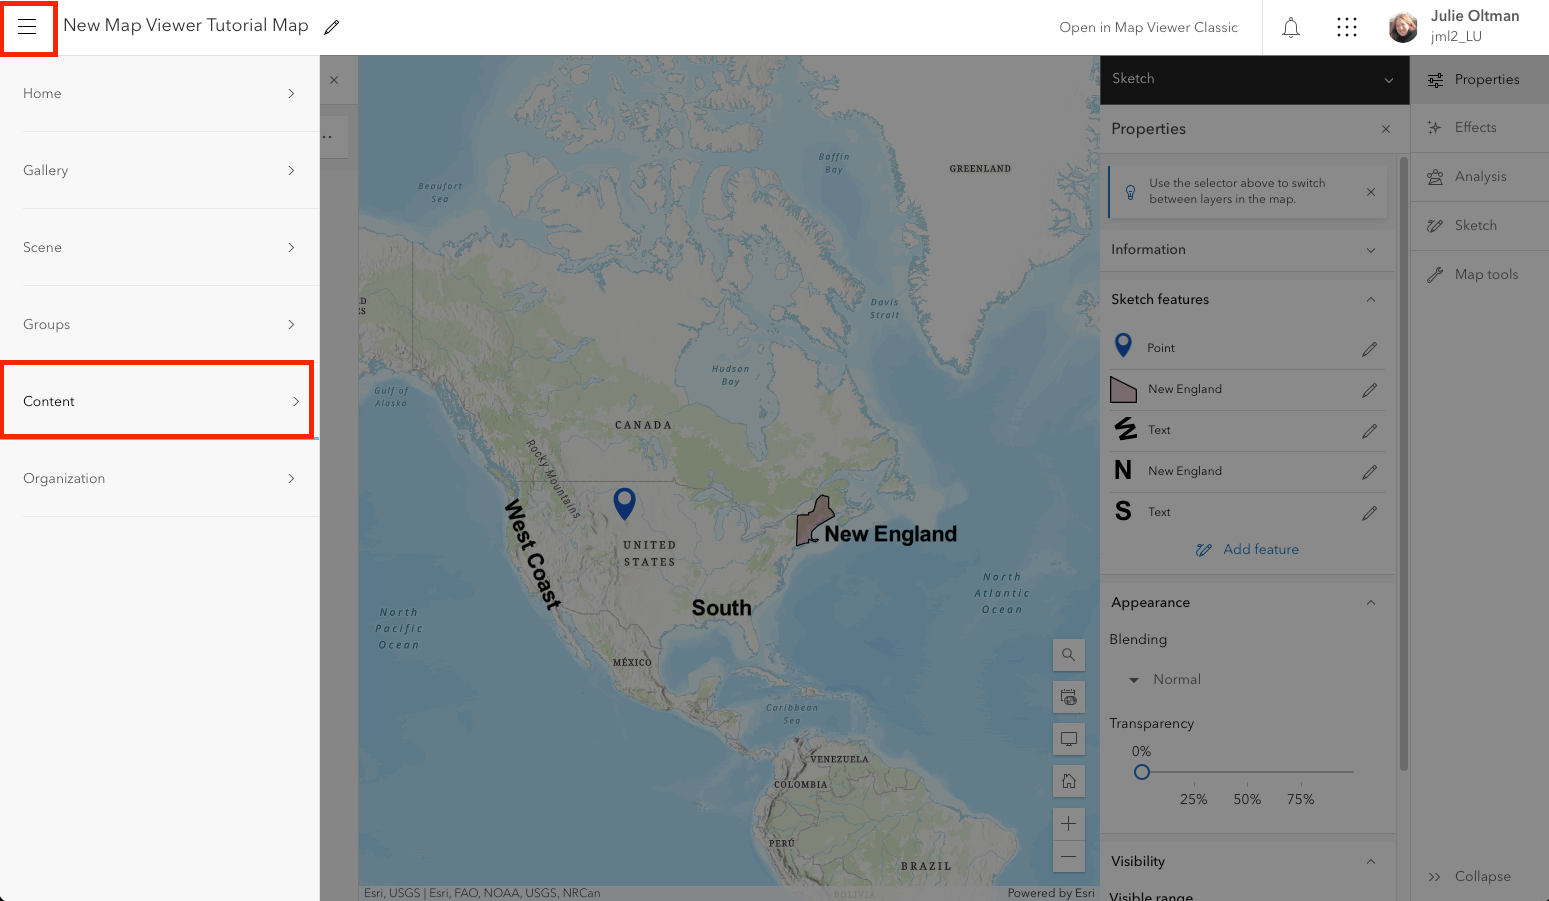
Your Content Library: Anything you save, will be stored in your CONTENT library. You can get to your CONTENT from the “hamburger” menu in the top left corner of your screen.
Sharing: Like in Google Maps, you need to Share your map in order to let others see it. This is one instance in which working in a Lehigh account is better than a personal account: You can share a map only to Lehigh users, or even to a sub-group within Lehigh. The really cool thing is that you can share your map with just a link! ArcGIS hosts your maps for you online.

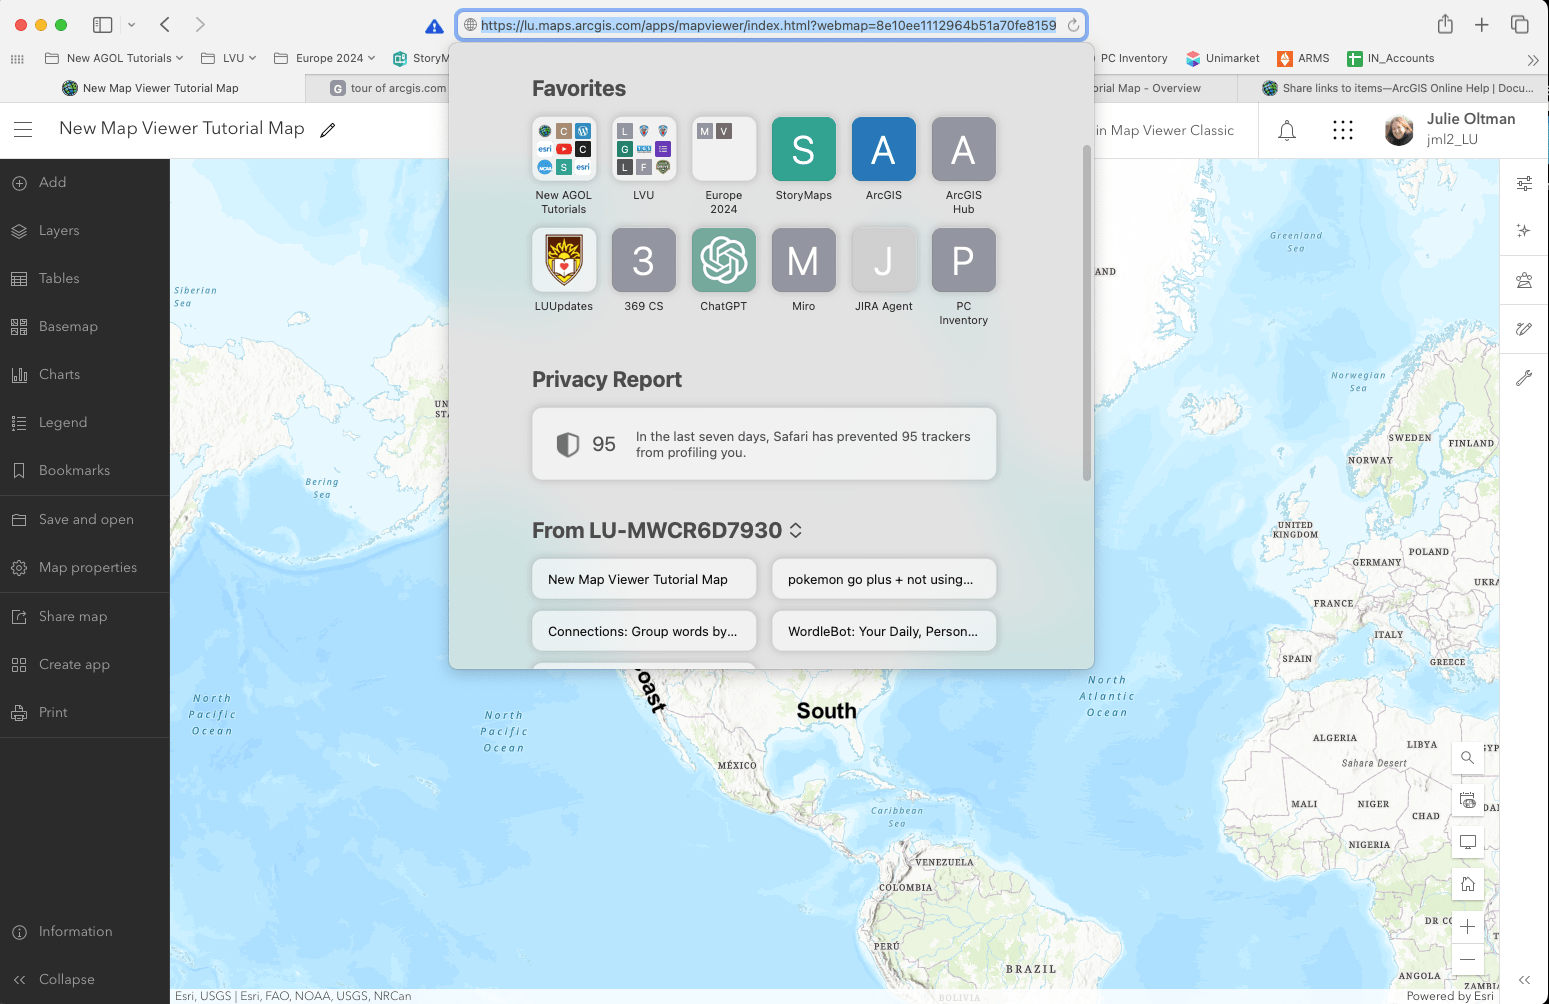
To get your map’s URL, simply copy the URL in your web browser’s nav bar:
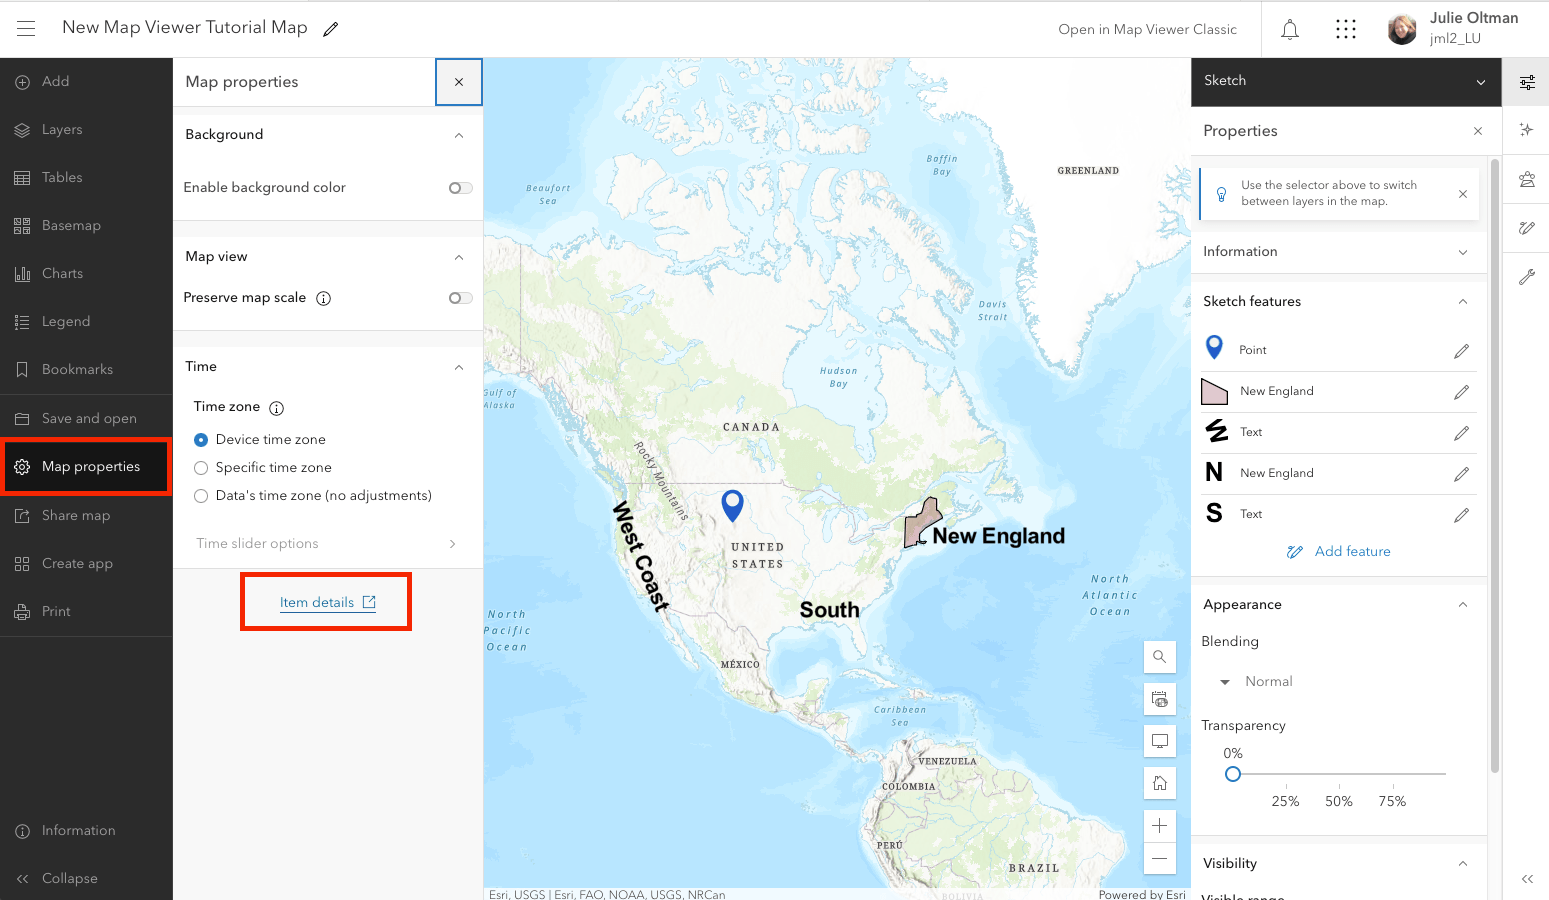
Alternatively, if you would like a shorter, cleaner URL, you can go to Map Properties –> Item Details –> Short URL button ![]() . This will create a URL that will bring folks to the details page for you map and then they can click the “Open in Map Viewer” button to view the map. Sometimes it is nice to have folks view the details of your map first before they open it up.
. This will create a URL that will bring folks to the details page for you map and then they can click the “Open in Map Viewer” button to view the map. Sometimes it is nice to have folks view the details of your map first before they open it up.

DO THIS ACTIVITY to review parts 1 & 2:
1. Create a sketch layer on a map. It can be of anything. Include at least 3 elements (pins, text, polygon, etc..)
2. Save your map
3. Set the sharing permissions to “Organizational” so that only Lehigh people can view your map
4. Copy and paste either your Long URL or the Short URL to this Google Doc.
PART 3 – Adding Layers
Adding layers of data/information to your map is one of the superpowers of ArcGIS! Sketch is nice but it’s limited. To make your maps WAY more powerful, you need to add data!
First, access the “Add” button by either going to the “Add” button at the top of the main left menu OR from within the “Layers” tool:

OR
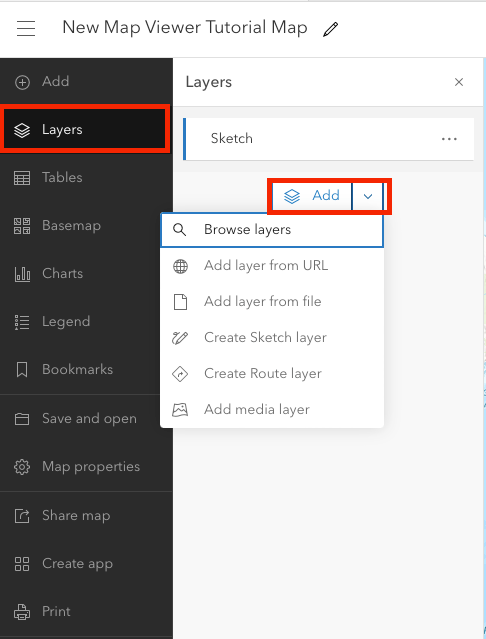
Here is a quick tour of some other key functions found within the ADD menu:
- ADD LAYER FROM FILE lets you upload other datasets…unfortunately, not a KML or KMZ file, but things such as .csv and Excel files. This is pretty easy but for your reference, or if you need to troubleshoot later, here are the detailed instructions.
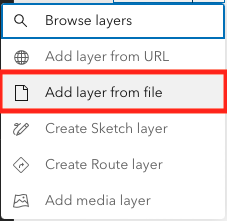
- ADD LAYER FROM URL lets you bring in a file that’s already parked on the web. Oddly enough, when you go this route, you CAN bring in a KML or KMZ file. (I have to warn you that the results aren’t perfect, though.) Types of data layers that you can bring in via URL include csv, kml, GeoJSON, ArcGIS Server web service layers, and others. Again, here are the detailed instructions for your reference.

- CREATE ROUTE LAYER This is akin to getting directions from Google Maps. You can use this Map Viewer to get a set of turn-by-turn directions from point to point. Check out this tutorial you’re if interested in this feature.

- ADD MEDIA LAYER This tool will allow you to place an image on top of a map. For example, you might want to layer a historical map of Bethlehem on top of the current map of Bethlehem. Here is a tutorial if you’d like to explore this functionality.

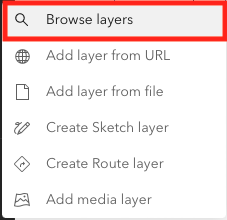
- BROWSE LAYERS is where the real excitement is. True, in Google Earth you can add layers, just like here. However, the layers in ArcGIS are a lot more diverse than the layers in Google Earth AND they’re user-generated.
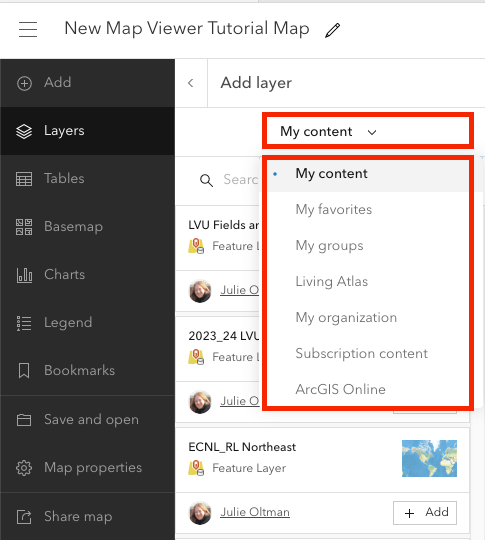
Once you’re in the search tool, click on the “My Content” drop down and you’ll see all the places you can search. Choose “ArcGIS online” and try searching for “Lehigh”. Your search should return a lot of possible layers you can add. Explore some of the other search options.
There are many different types of layers you can bring into ArcGIS. Check out this page that provides a comprehensive list of layer types and instructions on how to add it to your map!
DO THIS ACTIVITY to review Step 3
- Click on “Add”
- Choose “Browse for Layers”
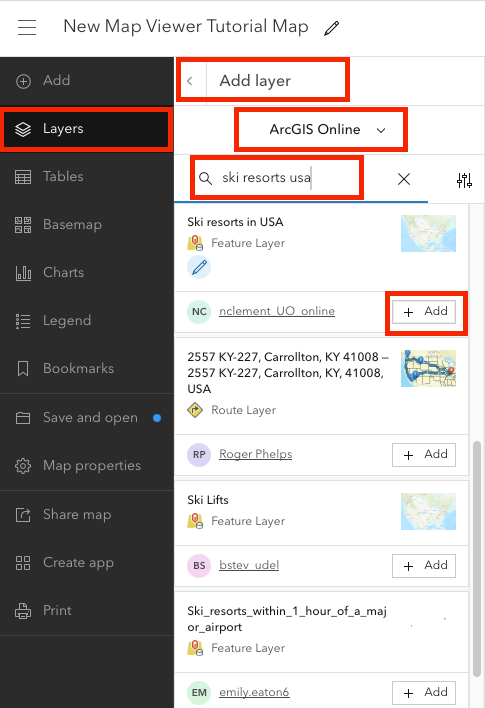
- Find a layer that interests you by searching either “Living Atlas” or “ArcGIS Online” and add it to the map you created in Step 1 and 2.
- Click Save. This will update your map URL to show the most current version.
Example: I chose to search for “Ski Resorts USA” in the “ArcGIS Online” library. I found a layer that had several ski resorts so I clicked “add to map” and it added points for various ski resorts to my map.:
As stated up top, ArcGIS.com does a lot more, but if you’ve followed the thread thus far, you’re off to a good start!
